Well I am officially done my major project and have created a beautiful quilt that I am so proud of! This was a long lengthy journey but it was worth it because I have discovered a new talent of mine!I can see me recreating this exact quilt and possible even trying new patterns! I have such a fun Journey with this project! Here is a video to show you where I started and how far I have come:) Enjoy!
Category: Learning to Sew
Final Step! Or Final Snips!
Well this last week I think it’s safe to say that I spent a good day on this final step of my blanket! Ugh this was by far the worst part of my whole learning experience. But also the best and most exciting because I get to see the final result of my quilt.
The final part of my quilt was to make snips in all the seams. This was such a tedious part of the whole project and never mind the pain I encountered from cutting with my scissors.
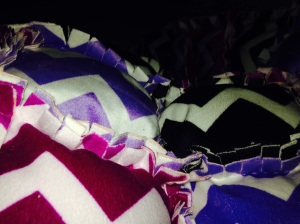
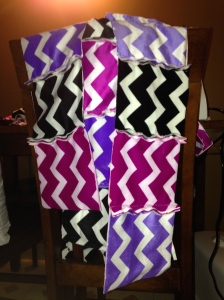
Not only did I have to cut snips in all the seams but I also had to make sure that I cut off all the loose threads. Once the threads had been snipped along with the seams I saw this…
This blanket is absolutely beautiful and I am actually flabbergasted that I even created something this nice from my first real sewing project. Who would of thought I had it in me to create this beautiful quilt! Not me. But guess I shouldn’t doubt myself! It’s amazing what one can create with some time and effort put into it
Now my final decision is what to do with this beautiful quilt! Decisions Decisions….
I’m Sew Very Close…
So its the day before my quilt is to be finished and I am on my final step. I’m so close to being done but yet so far. I am on one of the final stage of my quilt. I have to sew the long strips of squares together not only that but I have to also put stuffing in each of the little squares I have made. While trying to keep my stuffing in each square while sewing another strip together. I was so close but yet so far to being done.
This was definitely a lengthy process and I could see that it was starting to look like a real quilt. But as I was sewing I became so discouraged. Even though it was starting to look like a quilt it was looking like a terrible quilt. It seemed as if the seams were not lining up and that each row was going to be crooked. But as I got closer to the end it started to look hopeful. Once I finished the last stitch is when I realized it was all going to work out.
I am excited that after this I have one final step and my quilt will be complete. This process took me a around 4 hours to finish all together today, but once I finished it looked like a quilt!
Check out the process I went through with sewing my row together:)
The Enchanted Snow Queen!
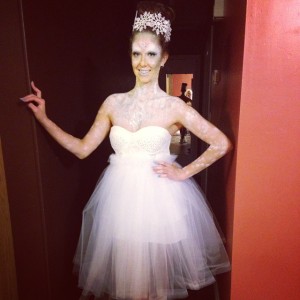
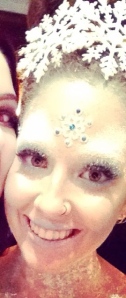
Well through the busy month of October I had time to put my new learning experience to the test. That test was creating part of my halloween costume. For Halloween I chose to be the Snow Queen. My idea for this came from an inspiration from a youtube video I seen last year for an Ice Queen. So I switched up a couple parts of the makeup look and created a fabulous costume to go with my Snow Queen look. This is by far one of my favourite costumes ever. Creating this amazing Snow Queen look was so fun and let me tell you all the trick or treaters loved it.
The part of the costume that I created was the skirt. Which was just A LOT of tulle and it surprisingly didn’t take as long as I imagined it would. I paired the skirt with a sparkly top I found a couple months earlier. Oh, did I mention I was planning this costume since last Halloween? haha
I thought this was such a great costume for me because I absolutely love winter. The snow is my absolutely favourite part because each snow flake is beautiful in its own individual way. I think I can see myself dressing up as this again in the future. Since I always have my costume picked out a year a head you’ll have to wait and wonder what I will be for Halloween 2015;)
Glueing My Way To Victory…
Well these last couple weeks have been somewhat of a blur! Between sewing my quilt and creating my Halloween costume I managed to complete the most challenging step through my learning process. That just happened to be placing each individual square with its partner and sewing them together. Talk about a difficult task.
Every time I’d place the two squares together they would look perfect. That is until I actually started to sew them together. Once the sewing took place thats when everything fell apart. The fabric started to slip and move around and I was getting more and more frustrated each time I ripped the stitches out and tried again.
Eventually I did end up taking a break because I was just getting irritated. So I decided that I wouldn’t work on it anymore today since I was getting no where. So I put it on hold until tomorrow.
The next day arrived and it was time to take a shot at it again. So before I started I decided to stop by fabric land and get some expert advice. I told them my problem and they suggested I try a bit of fabric glue. So I picked up my bottle of fabric glue and headed home. I was so eager to try this new method out. So I pulled out my sewing machine and away I went.
I started and everything was going great. The fabric glue really worked. I couldn’t believe how simple it became with just a couple dots of glue. Everything held in it’s place so I could finally make a perfect stitch.
Needless to say this was definitely the most challenging task I had with this learning experience. But once I figured out a neat little trick (fabric glue) it started to come together.
I’m Sew Excited:)
Well this is where the magic happens. All my basic learning was complete so now I must sew. So next was to start with all the preparation. Which in this case was to start with all the cutting of over 30 squares of material in each colour. Making sure they were all in similar size and shape and of course figuring out the pattern I wanted my quilt to have.
So first off I had to make a actually difficult decision on what size of squares I wanted to use on my quilt. so i ended up using 6” by 6”. I needed some sort of guideline so I grabbed an old piece of cardboard and cut that exact size of square that I would need for a stencil. I laid out my fabric and started to stencil the squares on my fabric. In each row I got three squares which resulted in 90 squares all together. But after numerous hours spent on cutting squares I got to the fun part of figuring out the design of my quilt.
So I laid all 90 squares of material down on my floor and started placing pieces of fabric everywhere. I tried to figure out a pattern scheme to go with, but in the end I just went with what I thought looked good.
This part of my learning experience was very repetitive and required a lot of patience. Cutting fabric really gets obnoxious, but it is one of the most curtail parts of the process. If your squares and shapes aren’t the same size then the whole pattern and look of the quilt will be off. But overall the fun part was placing the fabric for my quilt in my desired pattern:)
The music in the video is by an amazing country artist Kalsey Kulyk!
Preparation is the key to success…
Well my journey with sewing continues. This week is where all my preparation begins. To start I searched for the exact quilt I wanted too create. Through my search I ended up choosing a fluffy quilt. Which includes a little more work considering you have to stuff each square. I found my inspiration for this quilt on the internet of course.
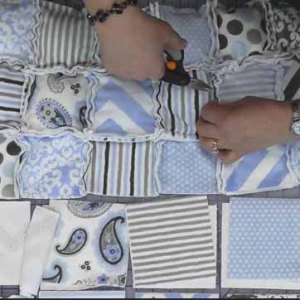
Photo Credit: ShannonFabrics via Compfight cc
Once I chose my quilt it was time to actually use my machine. Since I’ve only learned how to thread my machine I thought I better educate myself on how to sew now. So I of course turned to Youtube. On there I found a video of some of the popular stitches that are used when sewing. This video was perfect and very educational. But I was no where near ready to begin this sewing journey. I had to try some stitches out for myself.
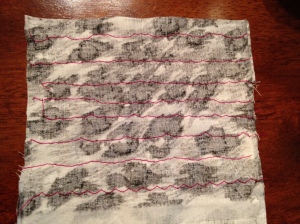
So I searched for an old piece of fabric and started to familiarize myself with all the different stitches I could make. Here’s what I got:
Now that I was familiar with all the stitches it was time to start practising how to exactly sew fabric together. So I began with a couple different shapes. I’ll admit it was a little tricky to manoeuvre around each shape and get an even stitch all the way. But after enough squares, circles and hearts I think I mastered it. Here check it out:)
Now I’m so excited to start actually creating my cute and cuddly quilt:D
May your bobbin always be full…
Out of all the things in the world I could learn I chose sewing. Sewing has always been an interest of mine. Since I actually just purchased a sewing machine this summer I thought this would be something great for me to learn, and you can be so creative with sewing. You can literally make anything that comes to mind. I had so many ideas that I wanted to bring to life, but unfortunately I have never sewn. So I thought that I would start with something simply but still challenging. So I have chosen to make a quilt.
Since I am not to experienced with sewing I chose to make a baby sized quilt. I chose to do a baby quilt because I doubt I would be able to finish a large quilt in the period of this course. Since I have never ran a sewing machine I turned to youtube for guidance. I watched a video on how to get my sewing machine set up. I’ll admit that I had to find a video on how to wind the bobbin. Through setting up my sewing machine I found winding the bobbin was my favourite part.
So now that I had the sewing machine I had to choose the type of material I was going to be using. So I chose a really soft an cuddly fabric called cute n cozy. I couldn’t decide on just one piece of fabric so I ended up choosing three. I of course picked my favourite colours to incorporate which is purple and black.
Now that I’ve got all my supplies I’m ready to begin my new learning experience and share it with all of you.
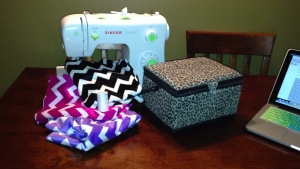
Heres a picture of me with all of my supplies:) Let the fun begin:D
